Sassy2Savvy

and everything in between… Wife, Mom, Sister, Friend

Tile Subway Art Craft October 2, 2012

Filed under: S2S Crafts,Uncategorized — sassy2savvy @ 9:37 AM

Fall Tile Subway Art

Here is a quick and fun craft to do at home. Pretty inexpensive as I used a lot of supplies I had from home. I did use vinyl lettering on mine and you can find the link to Uppercase lettering below. If you havent used them, I suggest you check them out. You may be hooked.

Supplies:

12×12 Tile (Had some left over)

Vinyl Lettering or Stickers (Lettering I used is from Uppercase Living)

Modge Podge (Optional)

Directions:

1.) Clean tile very good

2.) Practice Run: Arrange letter on tile before you decide to stick them down. Make sure this is how you want it to look.

3.) Create subway art by sticking the letters and or pictures to the tile.

4.) Optional to use modge podge as a sealer. If you use stickers then I would encourage you to modge podge the top to seal it.

Have Fun and Be Creative


Vinyl lettering I used was from www.wallwords4u.com


Spookey Fall Candle Holders September 24, 2012

Filed under: S2S Crafts — sassy2savvy @ 12:18 PM

Spooky Fall Candle

Holders

I can’t believe it is Friday already, before I start my weekend I would love to leave you with a decorating idea you may want to do over the weekend. It is very easy and the whole thing cost me I think 0.94 cents to do. I am in love with my mantel since I added these fun candle holders.

What you will need:

Vase or clear glass

scrapbook paper

Tape

Candle

Directions:

Measure paper and cut to fit around vase, create a wrap from scrapbook paper and tape on the back side. Drop in candle and you have yourself a spooky candle holder to add charm and character to your mantle or table. Fun for parties or events.


Button Monogram September 11, 2012

Filed under: S2S Crafts,Uncategorized — sassy2savvy @ 9:58 AM

Button Monogram

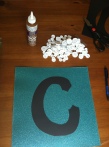
Many friends have expressed interest in a Button Monogram I did for my daughter’s room. It is a fun and easy craft, older kids would even enjoy making their own. I hope you like this as much as my daughter and I do.

Supplies:

– 12×12 scrapbooking paper (We used a card stock weight with heavy glitter)

– Button of choice

– Sticky tack glue/crafting glue

– Letter template (can be made from computer font)

– 12×12 Shadow Box (Got it from Micheals pretty cheap)

Directions:

Step One: Cut out letter template and glue to scrapbooking paper.

Step Two: Start glueing buttons on making sure to over lap your template so it does not show. The buttons will need to be layered in order to fill in the template. We have three layers of buttons. Dont be afraid to use a lot of glue, it will dry clear and you want your buttons to stay on (Note: Use different size buttons to give dimension).

Step Three: Once glued, let it sit for 24 hours to dry. Once dry, stand up and make sure all buttons are secure.

Finishing Tough: Put into shadow box style frame.

I told you it was simple and pretty easy. I have had so many compliments on this piece we did. Enjoy and happy crafting!!

Liz


Designer Plastic Bag Holder May 4, 2012

Filed under: S2S Crafts — sassy2savvy @ 11:15 AM

Happy Earth Day Friends

A great friend of mine showed me this awesome craft and I thought I would share it with you. I made mine in about an hour’s time. I have to say with Earth Day just a few days ago, this craft is all about recycling and reusing, while organizing at the same time. Let’s get started.

Designer Shopping Bag Holder:

Supplies:

Scrapbook Paper (12×12)

Solid Paper for Tag

Modge Podge (I used Matte finish)

Paint brush or sponge

Letter stickers or Silhouette machine

One large cleaning wipes container

Glue (Crafting glue)

1.)     Taking your Lysol wipes container, peel stickers off to just a clean white finish.

2.)    Measure and cut your paper to fit around the container accordingly, your paper will not fit all the way around but if you are using a 12×12 piece of scrap paper, then you will have enough to cut one small strip to fit the space that is not covered.

3.)    Using crafting glue, glue your paper to container, pulling tightly so that there are very little or no wrinkles. You will want to glue a small strip of paper first to container then wrap the remaining big piece of measured paper around the container.

4.)    Now that you have it all covered in the paper, take a solid color paper and scrapbooking stickers, create a tag.

5.)    Place tag to the front of container using crafting glue.

6.)    Once it is glued then you can start applying your Modge Podge to the outside of the container. This will paint on white, but will dry clear! I did three thick coats.

7.)    Open the top of the container and remove plastic pieces that hold in wipe. There should be a hole now that allows you to pull your plastic bag through.

8.)    Place plastic shopping bags in container. Mine hold 25+ bags.

Enjoy your new designer bag holder. I love mine!!! You will get lots of compliments from guests when you pull out your plastic bags. Happy Earth Day Friends and Happy Crafting.


Paint Can: Easter Basket/Gift Idea April 2, 2012

Filed under: S2S Crafts — sassy2savvy @ 10:41 AM

Paint Can Gift

I don’t know about you but this Easter I wanted to change up the same old same old Easter basket gift I give. So I went to the craft store in search of an idea to replace the basket idea. I needed to make a basket for a family memeber in order to mail off. The craft stores now sell paint cans!!! This paint can is not metal but a plastic look-a-like. I used this can and added grass at the bottom. I took a few stickers and decorated the outside to be bright and cheery. Next I stuffed my bucket and added the lid. I am in LOVE!!! So cute and mission accomplished. The bucket can be then reused to but ribbons, coins, or small toys into. I love anything that has a second purpose. Also this would be great for any type of gift giving, not just Easter!

Supplies Used:

– Paint Can (Craft Store)

– Easter Grass

– Stickers

– Ribbon to tie on the sides of paint handle

– Goodies to stuff in bucket

Have Fun Creating and Happy Easter!

Praise be to the God and Father of our Lord Jesus Christ! In his great mercy he has given us new birth having hope through the resurrection of Jesus Christ from the dead… (NIV) 1 Peter 1:3


Ribbon Wreath March 30, 2012

Filed under: S2S Crafts — sassy2savvy @ 9:51 AM

Ribbon Wreath

The main entrance into a person’s home is so important but often forgot about when decorating. This spring and summer I have set out to upgrade the front of my home with little projects that will bring color, personalization, and welcoming to any guest who walks through the front door. This project is fun and can be done in about two hours. You may also want to make one and use it for home décor, birthday party fun, or as I have done your front door.

Supplies You Will Need:

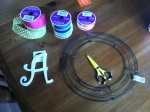
–           Wire Wreath (I used a 9” wreath but next one I make I would like to go bigger)

–           8+ spools of ribbon (Three different sizes .5-3 inches width and all different colors and patterns)

–           Crafting scissors

–           Wooden Letter (optional for personalization)

Directions:

1.)        Cut ribbon (6.5  inches long)

2.)       Tie ribbons around ring (Tie the larger width ribbon more on the outside and inside of the ring, the smaller ribbon will be used more as filler ribbon in the center)

3.)       Alternate colors and patterns throughout the ring

4.)       Once you have filled the ring up, take and scrunch the ribbon together, this will create fullness and fill in gaps with more ribbon.

5.)       Once you fluff the ribbon and get the fullness you desire

6.)       Hang wooden letter by tying around letter and attaching ribbon to ring

Now you should have a beautiful full wreath of color. Hope you enjoy this project but even more I hope you enjoy staring at your wreath as I enjoy looking at mine all the time. Love Love Love it. Let me know how yours turn out. Happy Crafting and Happy Spring


Weekly Menu/ Calendar Dry Erase Board March 28, 2012

Filed under: S2S Crafts — sassy2savvy @ 10:34 PM

Menu Board

It’s been nearly two weeks since my last post and I feel so excited to get back to creating. My husband and I were long overdue for a vacation, but now that I am back I have a lot of things to accomplish on my to-do list. I have taken up menu planning and wanted to create a board that would allow my family to know what was on the menu for the week. I found this great idea on pinterest and wanted to recreate it. This is not my idea, but throught it was creative and would look great in the kitchen. So I recreated it. This project was very easy and looks great. My daughter is a big fan of the new board. I purchased this frame from Wal-Mart for about $9.00. I took it home and used my left over scrapbooking paper and left over scrapbooking letters and created this menu/weekly calendar.

– Cut paper to fit behind glass

– Picked out letter stickers to create the days of the week

– Place the fitted paper behind the glass

– I had a dry erase marker laying around and attached velcro to the pen and side of the frame to hold the pen.

– This will be used to keep a weekly calendar and weekly menu

This project was simple and anyone can do it. Stay tuned for menu planning this week and other fun projects.


Tissue Paper Toperaries (Spring Decor) March 9, 2012

Filed under: S2S Crafts — sassy2savvy @ 11:16 AM

Toperaries:

This craft will add some color to a table top, fire-place mantel, or can even be used for birthday parties or baby showers. Just last week I made twenty center pieces for my daughters fundraiser breakfast. They were a big bit and added so much color to the room. This is fun to do with the kids. My daughter enjoyed helping me on this project.

Supplies:

Small Flower Pot (I used this metal watering cans 1.00 at Dollar Tree)

Floral Foam (1.00 at Dollar Tree, one block makes 3)

Sand or small river rocks (Rocks 1.00, sand Free)
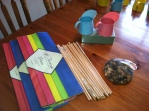
Small wooden dowel (Wal-Mart .64: makes 2)

Tissue paper (5 sheets of one color)

Scrap booking glue dots (Holds tissue puff to stick)

Optional: Stickers, jewels, paint (Painting the stick/stem)

Directions:

 Step 1: Take flower-pot/container and put in floral foam (cut to fit), around the foam fill in with dirt or rocks to put weight on the foundation of your toperaries.

Step 2: Now we will place the wooden dowel in the center of the floral foam. This will be the stem. (Optional: you can wrap dowel in ribbon or paint stick)

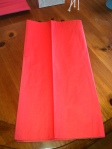
Step 3: (Hardest Part, See Photos Below) Now we will make the puff out of tissue paper. This is the hardest part and the tissue paper can rip very easily.

– 5 sheets of tissue paper laid flat

– Fold tissue paper in half and cut down the center  (now you should have 10 even sheets) Place all sheets on top of each other to have 10 perfect sheets laying flat.

– Now you will do an accordion fold (alternating back and forth, even folds)

– Take strong scissors and cut ends on each side to make a point or rounded (This helps give your puff shape)

– Place a tie in the center (you can use crafting wire for bows, or a bread twist tie)

– Let paper fan out on both sides, now pull tissue paper one piece at a time towards your center. It will crumple a little and this is okay (Alternate this on both sides) When you are done, you should have a tissue ball, even on both sides.
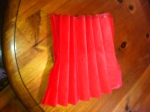
Step Four: Attach ball to top of the stick.Have fun putting these together and Happy Spring decorating.. Let me know if you recreate this fun craft.

The cost to make each one is about $1.90 (when you make multiples)


Book Mark from Paint Swatches February 23, 2012

Filed under: S2S Crafts — sassy2savvy @ 8:20 PM

I love crafts that I can do that include my girls. My girls always want to help and this was a fun project to do together. I used this project for my daughters Valentines for her class; however it would be great for party favors, book clubs, or even for personal use.

Here is a list of supplies that you will use in creating the bookmarks.

–       Paint Swatches (Free at WalMart or Hardware Store)

–       Paper Punch (Star, Heart, etc.)

–       Ribbon

–       Scissors

–       Rivets, Stickers, Jewels, Hole Punch (These are all optional)


Step One: Take paint swatches and heart punch (used for this project) and punch a heart in each box. (Do not put a punch in the top box)

Step Two: Use paper punch to place a punch in the top box. This punch will be straight up and down and not sideways as the other punches. (This hole will be used for tying the ribbon)

Step Three: Cut Ribbon (8 inches) and tie at the top of the paint swatch. (I tried two different types of knots and found that a double knot works best. Don’t pull ribbon to hard or bookmark can rip)

  • Optional: You can use a rivet punch and place a metal rivet to run the ribbon threw. It reinforces the hole which supports the ribbon.

Step Four: (Optional: Decorate with stickers, jewels, markers)

HAVE FUN!!!